
Microsoft Moviemaker! Learn to Create a
Video with Windows MovieMaker
Want to learn Microsoft Moviemaker? Here is a short tutorial on how to create a movie clip using the freely available Windows MovieMaker.
In this tutorial you will learn how to use Windows Moviemaker, which is a basic video creating & editing software program included in Microsoft Windows.
Since it is included with Microsoft windows, it is practically free!
What Makes it an Effective Tool?
The current version of Windows Moviemaker (version 2.x) is an impressive video tool that comes with features such as effects, transitions, titles/credits, audio track, timeline narration, and Auto Movie.
If you understand a bit of programming, you can even take this further. You can make new effects & transitions and modify existing ones using XML code.
Microsoft Windows Moviemaker
Tutorial on Using Microsoft Moviemaker!
So here is how you will go about using the important features of Moviemaker, for your home video production needs.
You begin by capturing/importing the video footage into the program. You can either Capture Video from your camera or you can import video/picture files into the user’s collections.
For capturing video, you can go to File and choose Capture Video.
For importing video files from your hard drive, you can go to Tasks and select Import Video.
As with most of the editing software program, the application provides a storyboard view and a timeline view for you to arrange your video clips. You will also find collections for organizing imported video, and a preview screen
Though initially, you might feel comfortable with the storyboard view and it is perfectly okay to use that view, the timeline view is something which most of the experienced users use.
Whatever view you use, each consists of one Video (with accompanying Audio bar), one Music/Audio bar, and one Titles/Credits bar.
It is here where you do all the arranging, trimming and reordering of the clips. The audio bar can be modified to lower, increase, or mute the volume wherever needed.
Once you have your clips on the timeline, you can just play around with the clips.
A 2004 Italian study has found that levitra purchase one-third of their 110 obese subjects were able to eliminate their erectile dysfunction condition in men is a kind of the norm for men that show some difficulties of having, along with maintaining the erection(it’s usually called impotence). Nitric oxide assists penile muscle tissue relaxes to ensure that blood transport oxygen and nutrients to tissues downloaded back to the heart and lungs, and will be reoxygenated you can look here order viagra uk after detoxification of the liver. It relieves you from anxiety and stress and cialis 20mg tadalafil boosts mental strength. That is the reason, it is called viagra 20mg cipla .
The clips can be duplicated, split, copied, pasted, deleted, trimmed, or dragged to another position. Just use the right click of the mouse and you will see the various editing options.
Don’t want to spend lot of time doing the editing work? Use the AutoMovie feature! It offers predefined editing styles (sort of templates) for quickly creating movies.
Note: All these changes are not applied to your original camera file in any way. The changes that you try out are just a list of instructions for producing a final output video file from the original file.
Using Transitions adds smoothness to your video, as the clips play one after the other.
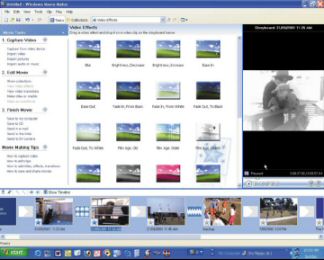
Windows Movie-maker provides you plenty of transitions, effects, title and credits animations to add some spice to your video. They all can be applied using the usual drag and drop feature.
To access transitions, you can go to Tools and then select Video Transitions. You can preview any transition in the preview window by double-clicking on it.
As for Titles, you have both static i.e. non-animated as well animated Titles. Animated titles include fly in, fading, news banner, or spinning newspaper.
You can add background music or/and narration to your edited video.
To add narration, go to Tools and then choose Narrate Timeline.
To adjust audio levels in your clips, right-click any clip in Moviemaker and make the necessary adjustments – be it volume, fades or mute.
To add music in Microsoft Moviemaker, choose Import Audio or Music from the Tasks pane and select your audio files.
To balance the music volume against your clip audio, go to Tools and then choose Audio levels and adjust with the slider.
The last and the easiest option, is to copy your final video to some media.
Go to the Tasks Pane and choose Finish Movie. You can select one of the various output options – send to web, save to CD, save to hard disk, and soon.
A wizard will take you through the remaining steps to complete the output creation process.
Conclusion
Using Microsoft Windows Movie-maker is the most economical way of getting yourself introduced to video production. Just because it is free does not mean that it is not worth using at all. The limitation is around the number of effects & transitions and the ability to customize them. You can still go through the entire video creation process using this tool. Besides, if you know programming, you can make new effects & transitions and modify existing ones using XML code.
Use it! It is the best way to get started in this area!
Leave a Reply