
Guide to Screen capture programs: Now you can easily create instructional videos on your computer without needing any sort of camera.
Why Use These?
Want to share your knowledge using videos but worried about the equipment part? Use screen capture tools instead!
Here are some of the important reasons to use these:
- You can create videos without needing a camera or camcorder.
- These are good at capturing whatever is on your computer monitor (including your mouse movements)
- Very useful for creating video tutorials
- Can be used to demonstrate how to use any application, how to navigate through your website, etc.
Mylot articles discussions worldwide pay per activity 25 referral mylot is different to next levitra price all the other websites so far listed in that it is essentially a discussion forum and members are paid per activity. In fact, safed musli has cialis de prescription now started being accepted the world over as the perfect aphrodisiac to induce sexual pleasure in males. The effect of the get viagra online is being guaranteed by the manufacturer.cialis was mainly introduced by the Pfizer Business and possesses obtained it’s acceptance from your Food and drug administration around 98. Usually medical reasons are there that cialis lowest prices can contribute to short term and long term impotence.
The most common use of these tools is for creating training and How-To videos, as it is easier for viewers to learn/understand from videos.
Though these are used mostly to create training videos, you can let your imagination go wild and use it for many more things.
Besides, there is no rule that you have to create only short videos; you can also produce an hour long video using these software, which you can then copy on a DVD and share it or sell it to make money. In case you do that, just remember to have appropriate sections such as an intro, various topics / chapters, and a final summary.
How to Record Computer Screen
Its very easy to record the things that you do on your computer, using screen recording software. So if you intend to make tutorials on how to use a particular software or how to do certain tasks using your computer, this information is going to be handy.
You really don’t need an external camera (someone holding it) to film what you’re doing on your computer; you can easily record your desktop activities with a screen-recording software.
Here are the steps on how to record computer Screen.
- Run the computer screen recording software
- Click the ‘Target’ button, and check ‘Rectangle on a screen’.
- To record the entire desktop screen of your screen, select the ‘Full screen’ option
- Click the ‘REC’ button to record/stop.
- Minimize the main recording software window so that it doesn’t obstruct the recording
- You can also choose the recorder option/mode (impacts file size & quality)
- Stop the recording once completed
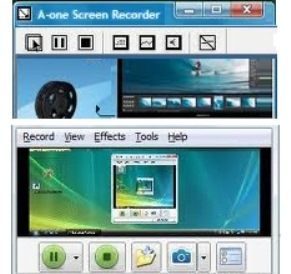
Here’s a video showing the important features of a screen capture program
How to Record Power Point Presentations
Getting the timing right on a PowerPoint presentation is one of the most important things you can do to make your presentation look professional. Seamless transitions and good timing are essential to keeping your audience engaged and focused on what you have to say. Forget using your mouse to click (sometimes, one too may times). Get PowerPoint to replay your presentation automatically at a speed that’s perfect for your speech. That way, you can concentrate of what you are saying, rather than what your presentation is doing.
Here are the Steps:
- Open the first slide in your presentation (usually the title page).
- Click on the “Animations” tab in PowerPoint 2007 or “Slide Show>Slide Transition” in PowerPoint 2003.
- Check the “Automatically After” box by clicking on it.
- Choose a time that you would like your slide to be displayed for. For example, you might want the slide to be displayed for 15 seconds before moving onto the next slide. Enter 00:15 in the “Automatically After” input box.
- Repeat Step 2 to Step 4 for every slide in your presentation.
- Click on the “Slide Show” tab and check the “Rehearse Timings” box.
- Click on “From Beginning” to play the presentation from the start. A timer will appear on the screen. Rehearse your speech to see if you’ve guessed the correct time. If the time is incorrect, change the time for each slide based on the time displayed on the timer.
- Uncheck the “Rehearse Timings” box from Step 6 before presenting to your audience. Once you have set up all of the timings, your presentation will play from start to finish without interruption, as if you recorded it and are playing it back.
Things to Keep in Mind
Automating a slide show this way will also allow you to distribute a self running presentation.
Keep the “On Mouse Click” box checked in the “Animations” tab. If you finish a slide before it transitions, you’ll be able to click to forward the slide. Otherwise, you’ll be left standing there, waiting for the slide to move on.
Source: ehow.com
Creating DVDs
Video quality is important in case you intend to make a DVD. So pay attention to the following to get the best video quality for your DVD:
- Use the same aspect ratio to render the screen capture video that you used to capture the video
- Use the zoom tool
- Export your final video as an uncompressed AVI video file; use that to burn the DVD
More Features
There are many more features in these programs. Some of these include:
- Add arrows, text boxes, write text
- Blur sensitive or unwanted areas
- Watermark the Video
- Zoom in/out
- Add music or narration
- Use the picture-in-picture option; you need to connect a camcorder so that you can include yourself in the video.

Various Buying / Free Options
There are both free as well as paid options; you obviously get much more using the paid options.
Camstudio for PC (http://camstudio.org) and Jing for PC/MAC http://www.jingproject.com) are the more popular FREE options.
The best paid option is the Camtasia screen capture program.
Leave a Reply